A how-to guide to blocking unwanted calls from the Customer Portal using the Caller ID BlackList Tab.
Blocking unwanted calls and callers is a click away. Follow the step-by-step process below to add numbers to the Caller ID Blacklist:
- Log in to the Customer Portal with the PBX Admin access.
- Once the page loads click on the PBX Settings icon.

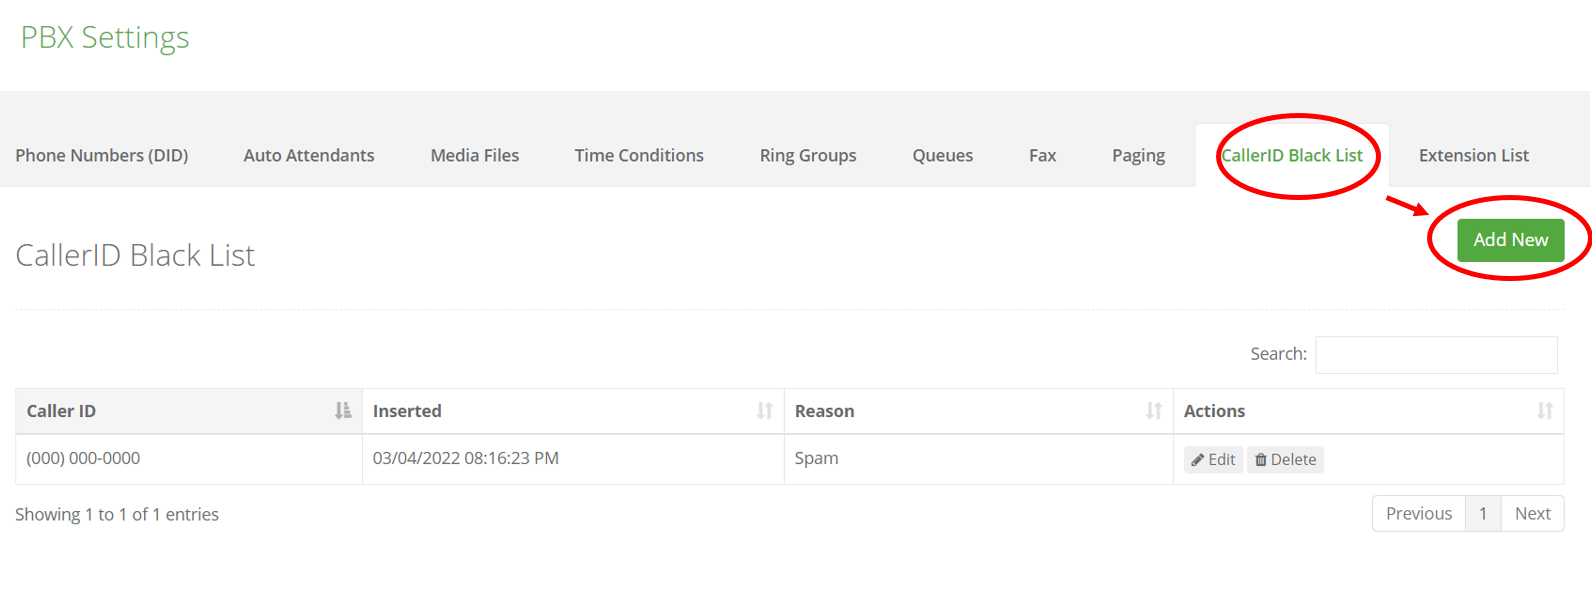
- On the next page, find the "Caller ID Blacklist" tab.
- To add a new number to the Blacklist, click on "Add New."

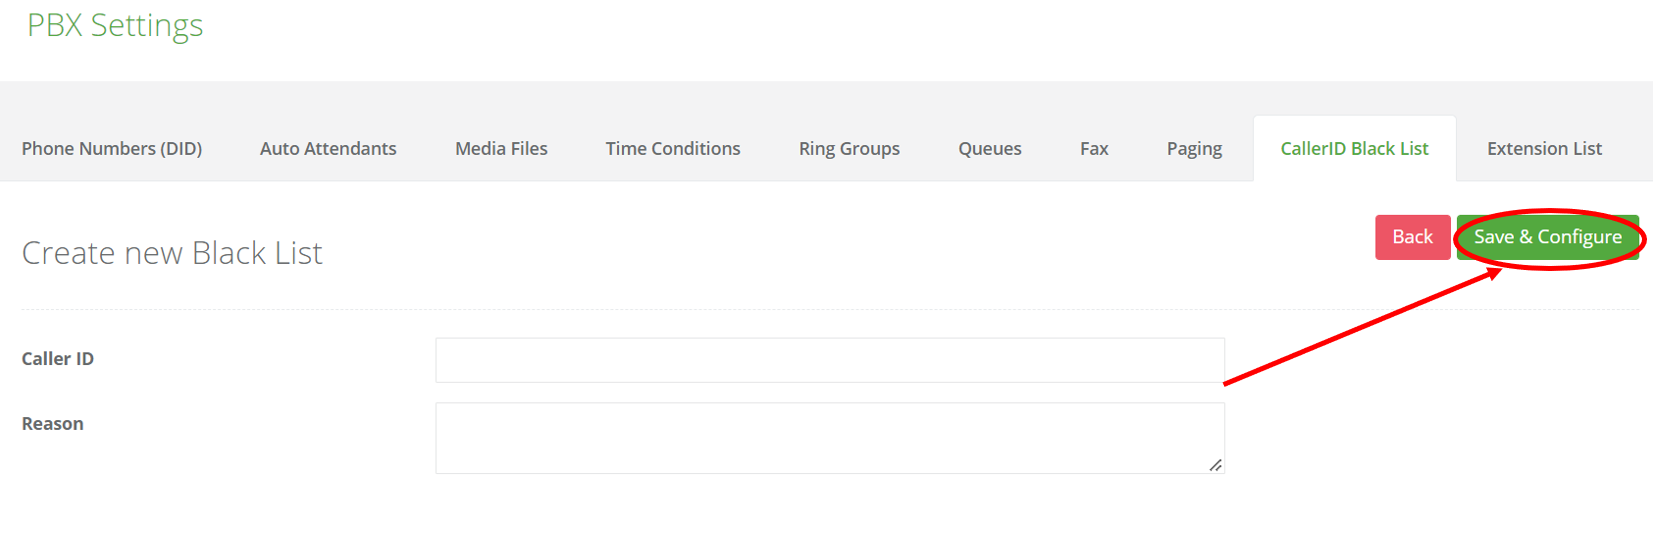
- When the page loads, next to the "Caller ID" line, enter the number you wish to add to the black list.
- On the next line, next to "Reason" enter a brief description of why this number is being added to the black list.

- Once done, click on "Save & Configure" to finish the process of adding the number.

To manage numbers in the existing black list follow these steps:
- Log in to the Customer Portal with the PBX Admin access.
- Once the page loads click on the PBX Settings icon.

- On the next page, find the "Caller ID Blacklist" tab.
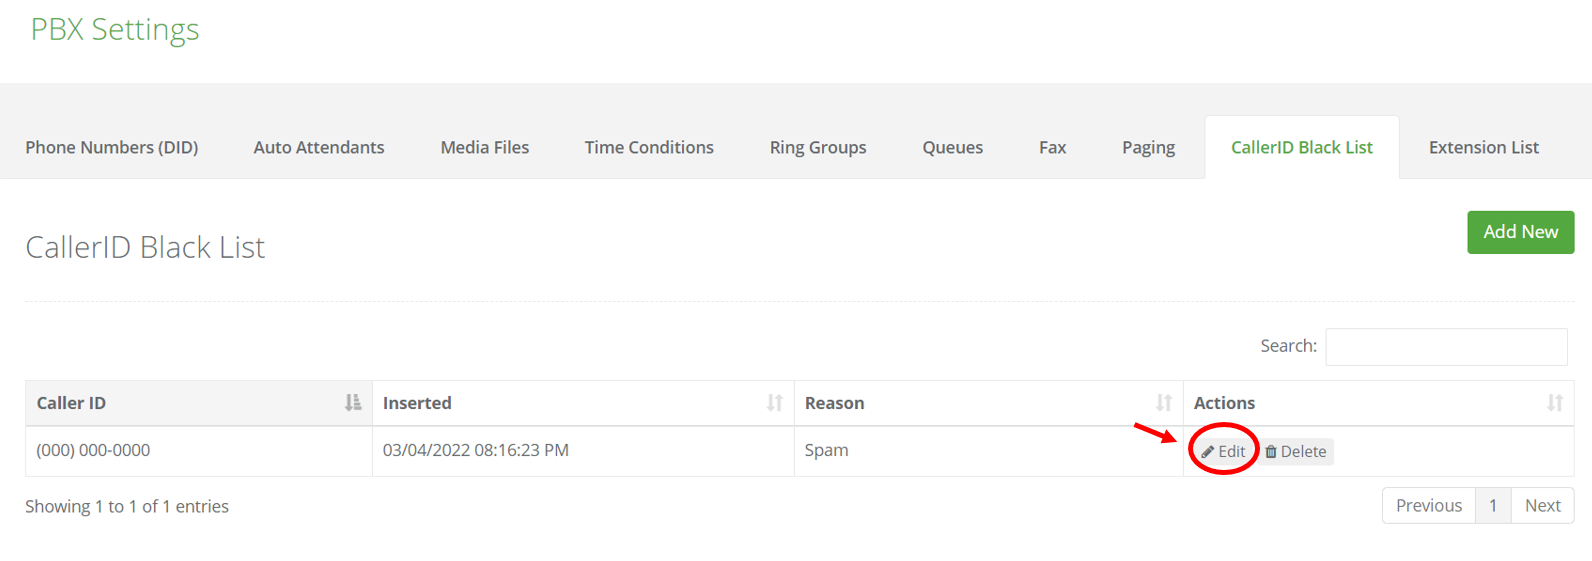
- Then find the number in the black list you wish to edit and click on the "Edit" pencil icon.

- The next step is to edit the "Caller ID" or the "Reason" line for the phone number in the list.

- Click on "Save" to keep any changes made.

- To return to the previous page click on "Back."
- Additionally, click on "Delete" to remove an entry from the Caller ID Blacklist.

Note: Partners can also add and remove Caller IDs as well as manage the existing ones on behalf of customers from the Partner Portal.
