Sound files or media files for GreenLink are the MP3, WAV, and files that can be uploaded or recorded to later add to your GreenLink account. These are used for the auto-attendant messages and the IVR but are not limited to that. In this article, you will learn how to record media files, upload media files and manage your existing ones from the Customer Portal.
Recording media files from the Customer Portal
- Log in to the Customer Portal with the PBX Admin access.
- Click on the PBX Settings Icon.
- When the page loads, click on the MEDIA FILES tab.
- Then click on ADD NEW on the left-hand side of the screen.
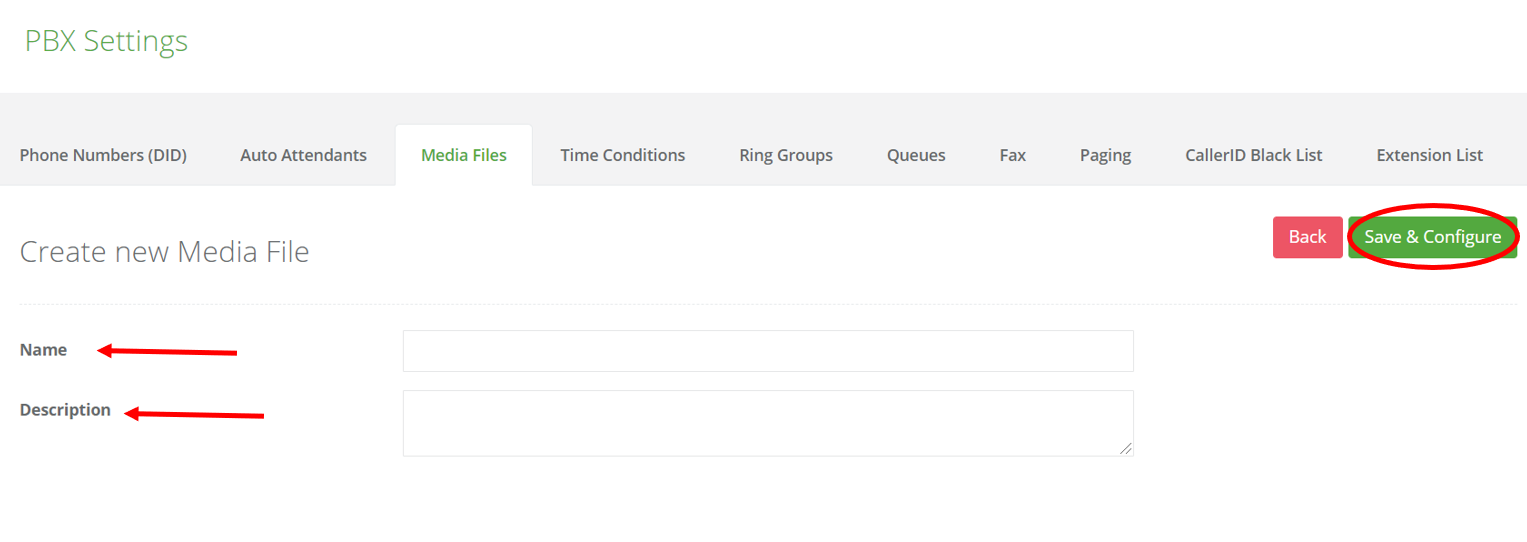
- Once the page loads you will need to enter a NAME and a DESCRIPTION for the new recording.
- Then click on SAVE & CONFIGURE.
- The page will reload and now you will see the RECORDING METHOD options. Choose CALL EXTENSION to record it yourself from a GreenLink phone.
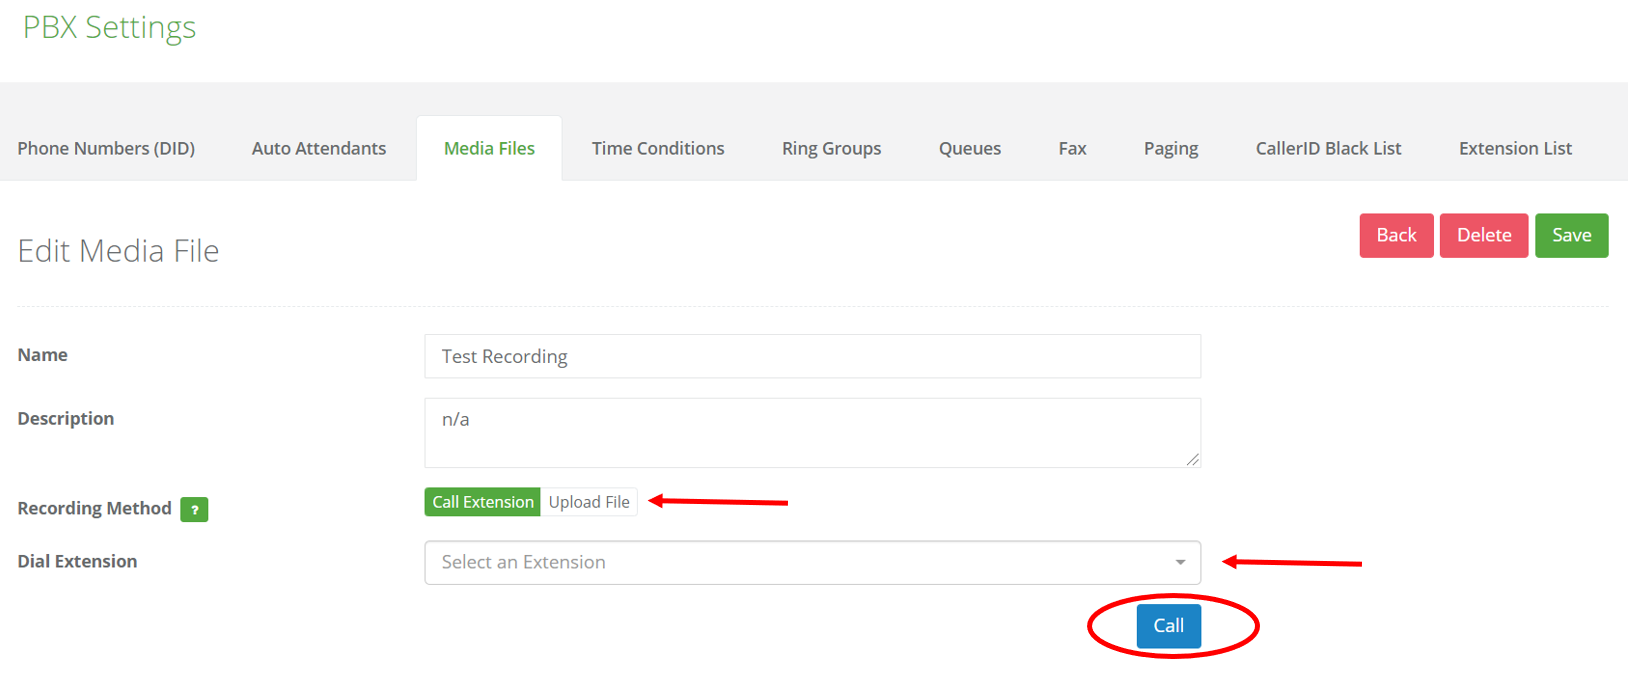
- Then on the drop-down below, click to view a list of the extensions available to call and scroll until you find the one you will use.
- Once done click on SAVE, to complete the process.
Adding external media files from the Customer Portal
To add external media files from the Customer Portal, the same steps will be followed with one variation at the time of selecting the RECORDING METHOD option, the steps are described below:
- Log in to the Customer Portal with the PBX Admin access.
- Click on the PBX Settings Icon.
- When the page loads, click on the MEDIA FILES tab.
- Then click on ADD NEW on the left-hand side of the screen.
- Once the page loads you will need to enter a NAME and a DESCRIPTION for the new recording.
- Then click on SAVE & CONFIGURE.
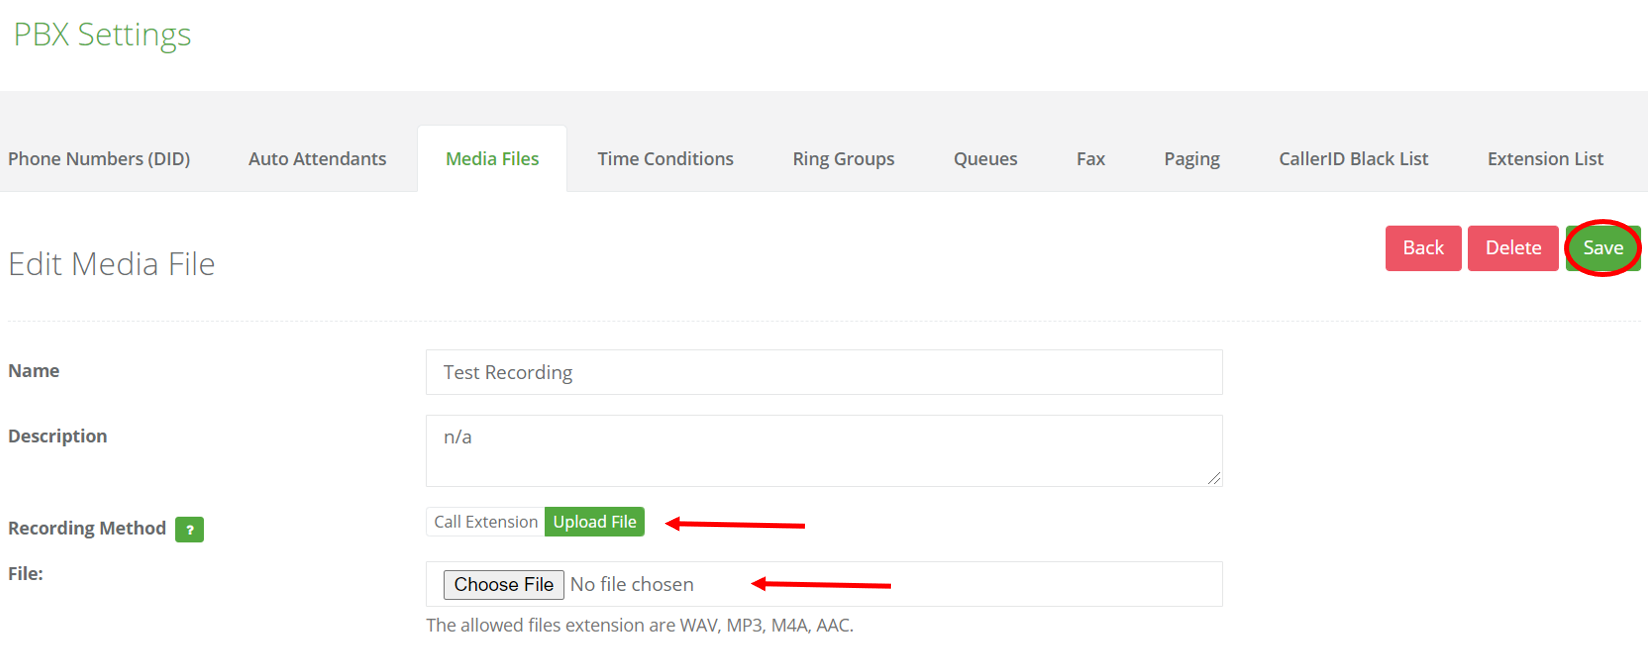
- The page will reload and now you will see the RECORDING METHOD options. Choose UPLOAD FILE, to use a pre-recorded media file from your desktop.
- Once done click on SAVE, to complete the process.
Managing existing media files from the Customer Portal
Once a media file is added to the Customer Portal, you will need to go to your existing MEDIA FILES area to manage them. These are the steps:
- Log in to the Customer Portal with the PBX Admin access.
- Click on the PBX Settings Icon.
- When the page loads, click on the MEDIA FILES tab.
- Choose the media file you wish to manage from the list and click on the desired ACTION you wish to take. (PLAY/EDIT/DELETE)
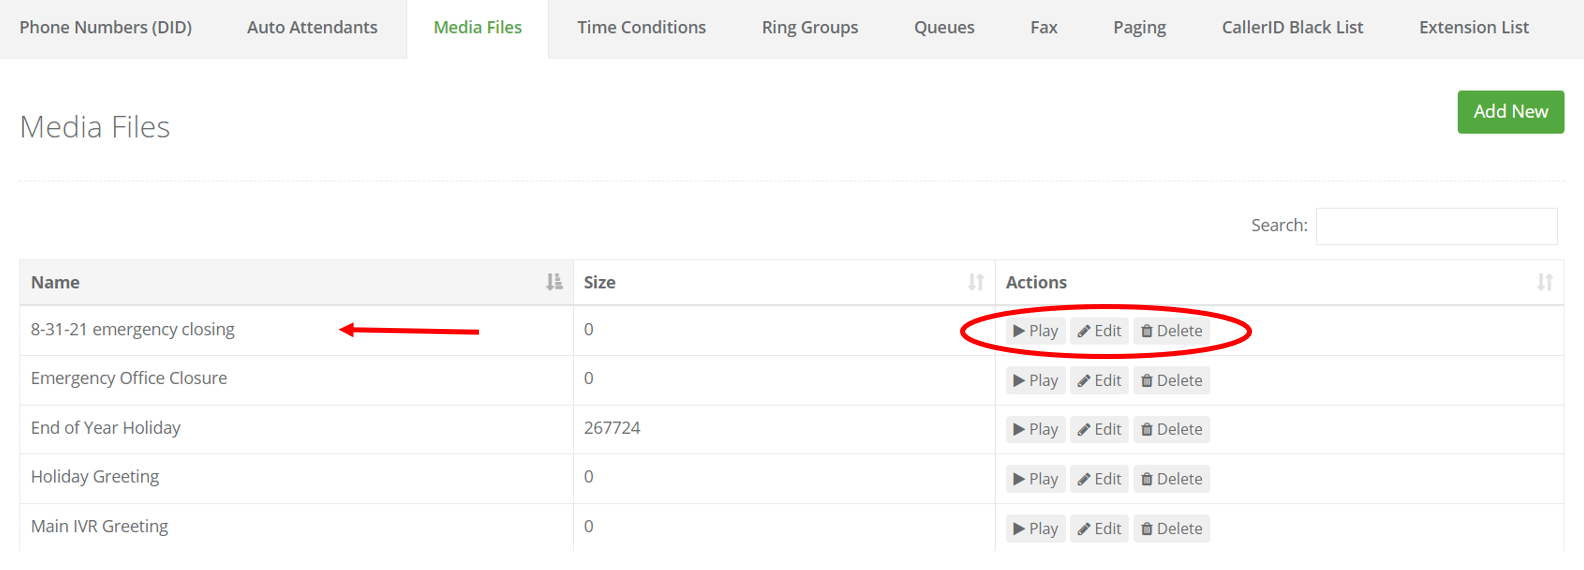
- When choosing EDIT, this will open a new list of options allowing you to modify the name of the recording, the description, and even the recording itself by recording a new one or adding a media file from your desktop.
- When finished with the edits, click on SAVE.
IMPORTANT!
-The file format should be .WAV/PCM/8Khz/64hbps.
When choosing to PLAY this will not make any changes to the file. Only choosing the DELETE option will make a change, and a confirmation pop-up will show before making the deletion final.