Users with Admin access are able to manage their own extension settings and the extension settings for all other users in their company.
From the Customer Portal's dashboard, click on the icon that reads EXTENSION. This will reload the page and show the Extension Menu options available.

Listed below are each of the settings an Admin User can manage and how to do each one from the Customer Portal.
Changing the name on the extension
Procedure
- Log in to the Customer Portal.
- Click on the EXTENSION icon from the Customer Portal.
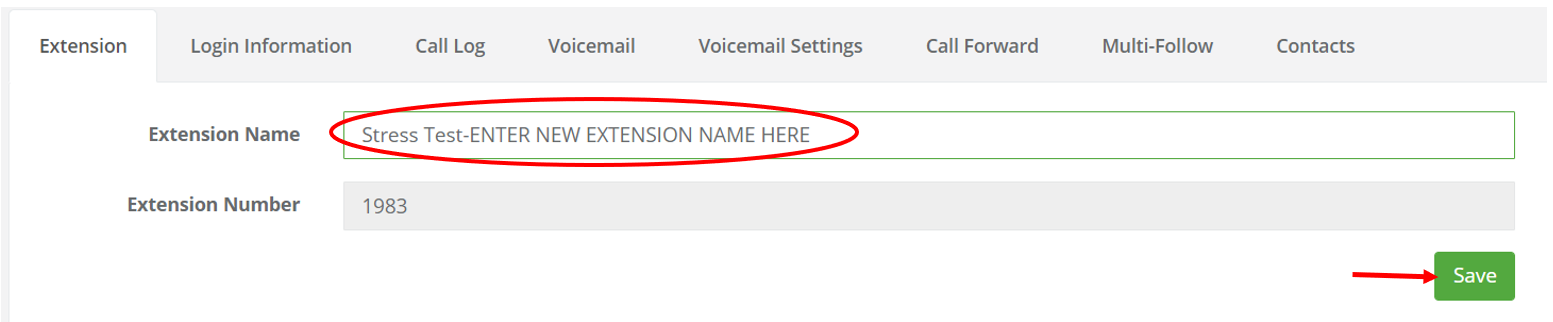
- Make sure to be on the Extension tab once the page loads.
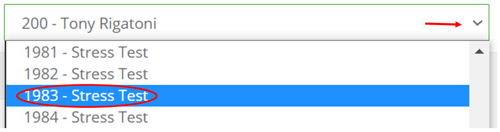
- On the top, right hand side, there will be a drop down with the Admin's own extension. Click on the drop down to change the extension.
- Choose the person's extension to change/update.
- Then next to Extension Name, enter the new name for the extension.
- Click on SAVE.
Call Log Information
Procedure
- Log in to the Customer Portal.
- Click on the Call Log tab.
- On the top, right hand side, there will be a drop down with the Admin's own extension. Click on the drop down to change the extension.
- Choose the person's extension to view the Call Log.

- Once the page loads and the extension has been selected you will have several options to manage/view from this tab:
- Filter calls (by date, source, call ID, destination, duration, etc.).
- Export a report of the calls in the log.
- Archive reports of the calls.
- If there are multiple pages of call logs you can skip through them using the PREVIOUS or NEXT buttons.
Voicemail Options
Procedure
- Log in to the Customer Portal.
- Click on the VOICEMAILS icon.
- Once the page loads you will view your voicemails.
- Next on the top, right hand side, there will be a drop down, click on the drop down to change the extension.

- Choose the person's extension you wish to view and this will give you access to an array of options to manage in the chosen extension:
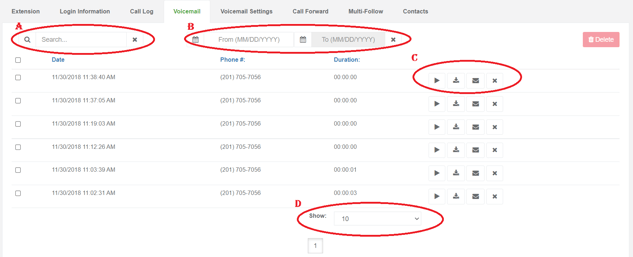
- Search bar: this allows you to search the voicemails by phone number and contact name.
- Calendar filter: this will allow setting specific dates in which to view voicemails.
- Voicemails action buttons: You can Play
 , Download
  , Email
  or Remove
  voicemails with these buttons.
 - Show filter: this allows you to set the count for how many voicemails to view per page.
In addition to viewing the voicemails on the extension chosen, the Admin can also manage the extension Voicemail Settings.
Voicemail Settings
Procedure
- Click on the Voicemail Settings Tab
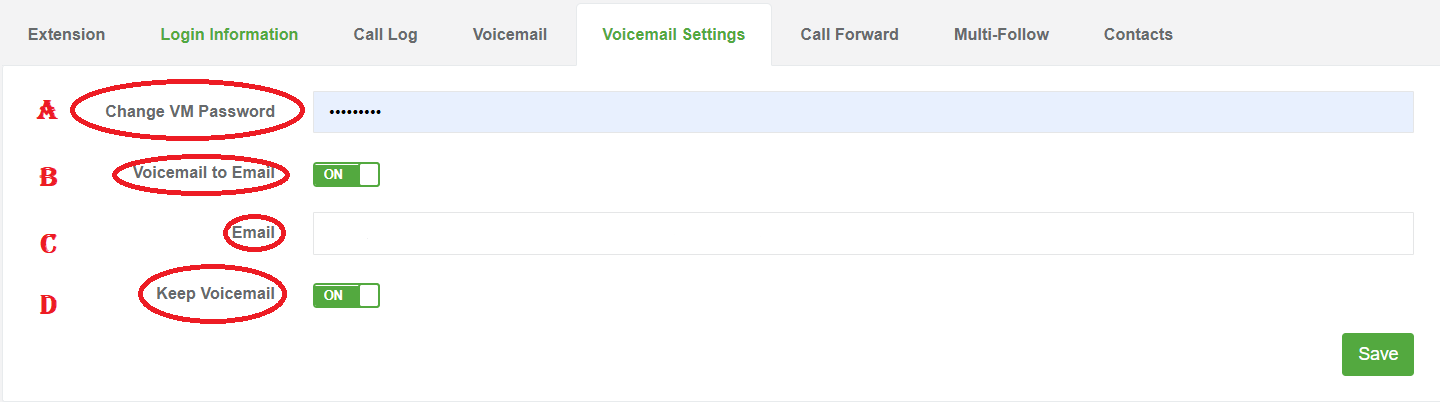
- Once on the page loads, you will be able to manage the following settings:
-
- Change the VM password: you can change your extension's voicemail password by entering the new 4 digits password (only numbers) and clicking on the SAVE button.
- Voicemail to email: when this option is enabled you will receive all voicemails directly to your email as a .WAV file.
- Email: this is the email (or emails) where you will receive your voicemails.
- Keep Voicemail: when this option is enabled it keeps voicemails on your phone and sends them to your email as well.
Click on the SAVE button once you are done.
Call Forward
Procedure
- Click on the Call Forward Tab

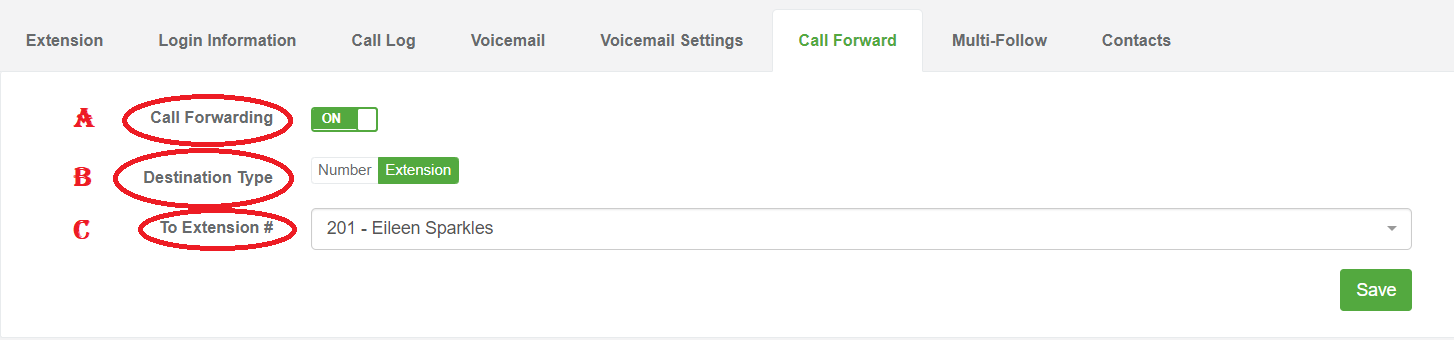
- Once the page loads you will have the following options:
-
- Call Forwarding: for call forwarding to happen this option needs to be ON.
- Destination Type: calls can be forwarded to an Extension or to a Number.
- To Extension/To Phone: if you choose to forward your phone to an extension, click on the drop down next to Extension# to choose where the call will go. If forwarding to a phone number, make sure to choose the Destination Type as Number and then proceed to enter the number next to Phone#. Once finished, click on SAVE to complete the changes.

Multi-Follow
Procedure
- Look for the Multi-Follow tab
 and click on it.
 - When it loads you will have the following options:
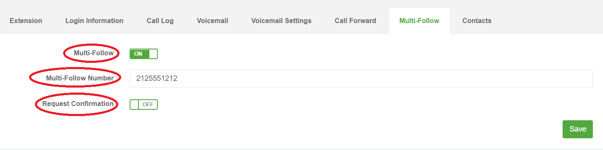
- Multi-Follow switch: when ON, it enables the multi-follow function. When enabled and a call comes in, it will ring on both the desk phone in your office and the mobile number added while keeping the call on your office's system. If the call is accepted on the mobile phone, it will be sent to your mobile phone system; if declined it will remain within the system and is sent to your office's voicemail.
- Multi-Follow Number: this is your preferred number for calls to be diverted to when using this feature.
- Request Confirmation: when this is enabled you will hear a message before deciding if you want to Accept or Decline a Multi-Follow call. If declined the call with be sent to your office's voicemail.
For any other major updates that require mass programming and reassignment of extensions, porting, and other changes like setting up a new employee with a new extension on an existing DID send the request to: Help@greenlinknetworks.com with the details of what needs to be changed.