Procedure:
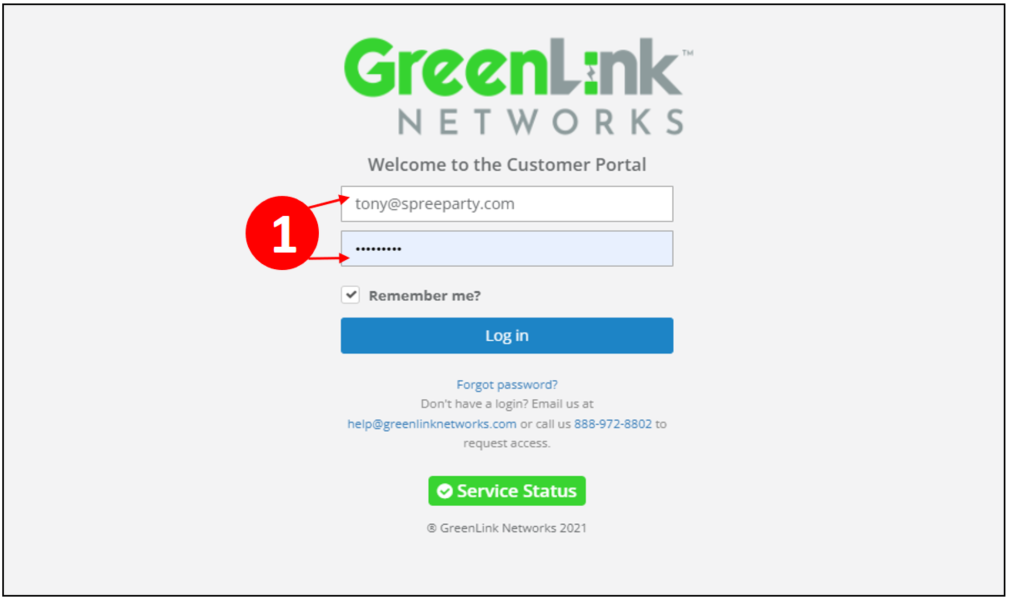
- Log in to the Customer Portal with the PBX Admin credentials.
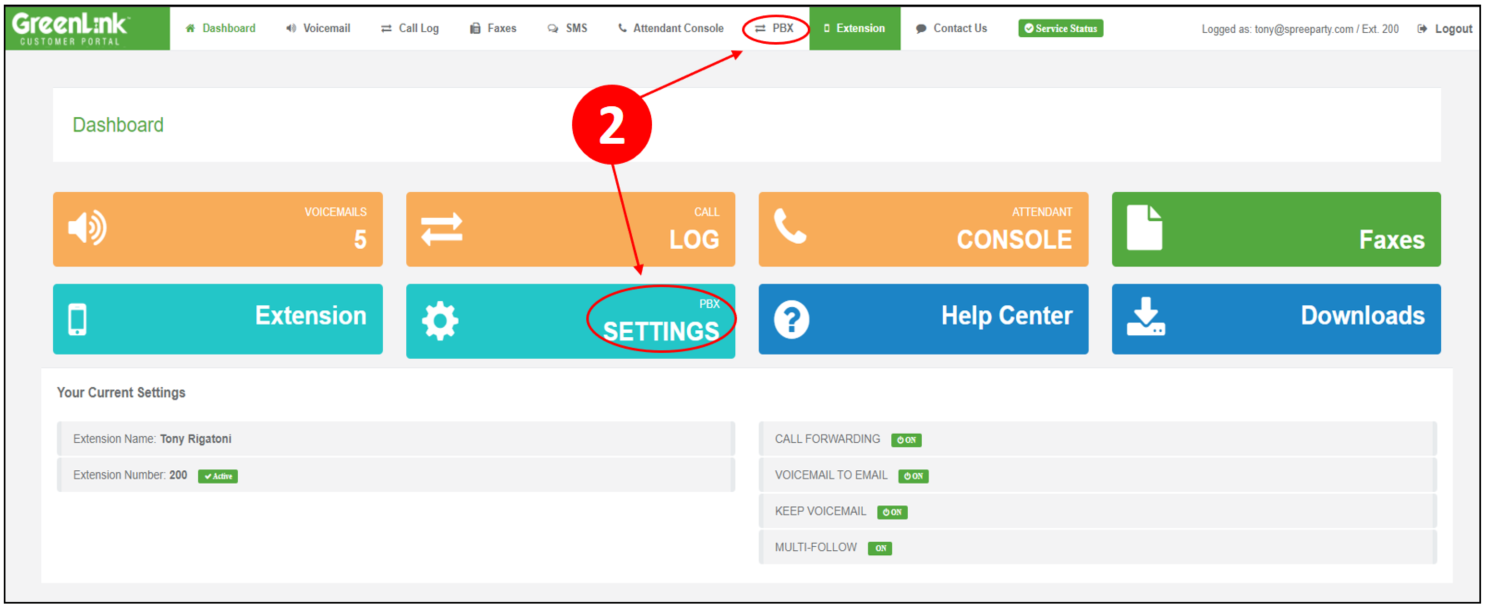
- Click on PBX.
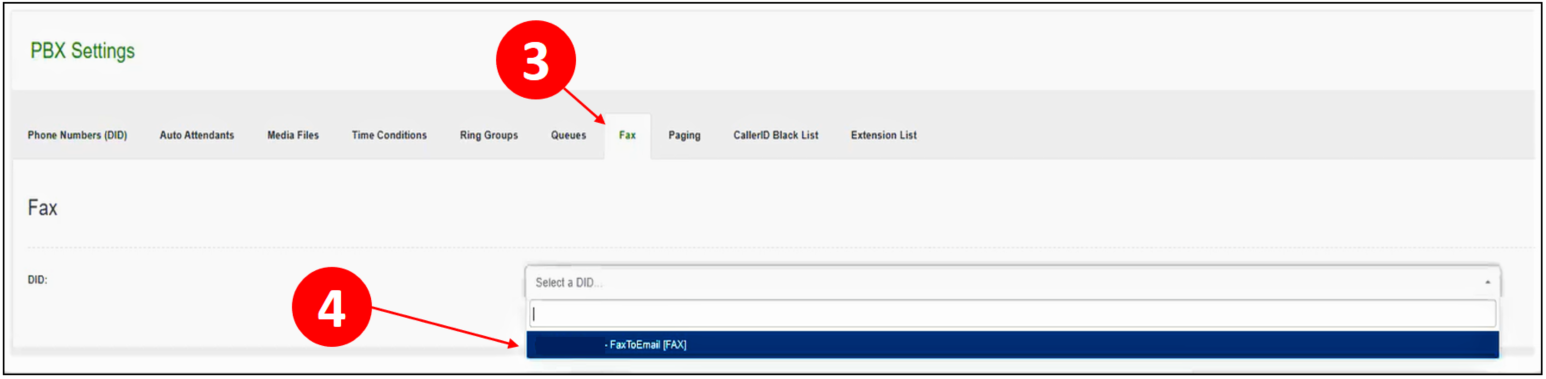
- Click on the FAX tab.
- Next to DID, click on the drop down menu and choose the DID you wish to edit.
- Once selected, go to the "Fax to email destinations".
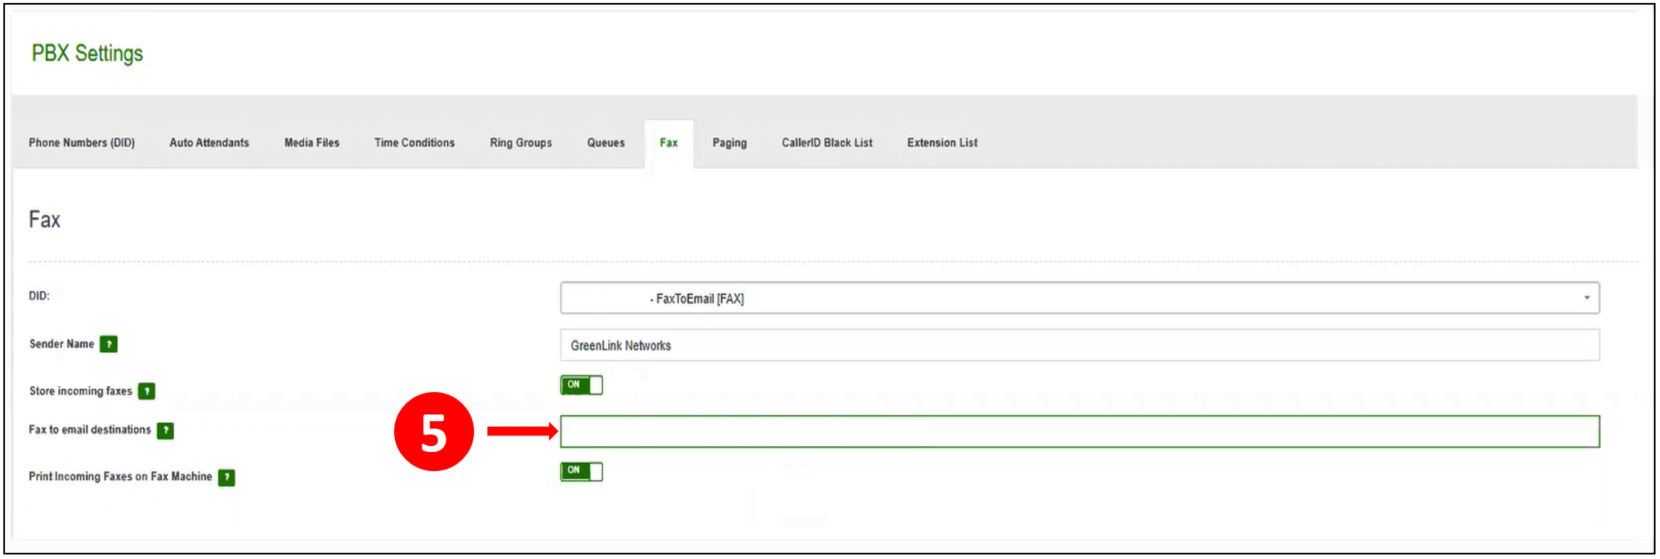
- Proceed to modify the destination email as needed, either removing the current one or adding additional email addresses for fax delivery.
- Once the change is made, make sure to SAVE.
Now all incoming faxes will be delivered to the new email added.
Note: Our PBX has a limit of 255 characters for the email destinations field. The emails added must be separated by commas (,). The recommendation for best use of the space would be around 10 emails for that fax to email destination field. If the emails are shorter than usual it is possible to add more than 10 as long as the 255 characters are not exceeded.