This service can be added to existing accounts on a per-user basis.
Once your SMS/MMS access has been enabled these are the steps you will need to start using the feature:
- Log in to the Customer Portal
- Go to SMS
From the SMS section, you can:
• Send/receive SMS/MMS (in this article)
• Move between DIDs (if you have more than one DID that is SMS enabled)
• Configure SMS/MMS notifications (by DID)
Send a new message
Sending a message via the customer portal can be done in 2 different ways.
New Message
Clicking the “New Message” button (top-left) will present a popup where you can specify the contact (from the phonebook) or the phone number you would like to send an SMS/MMS to.
After selecting the contact or entering the number, press “Message.”
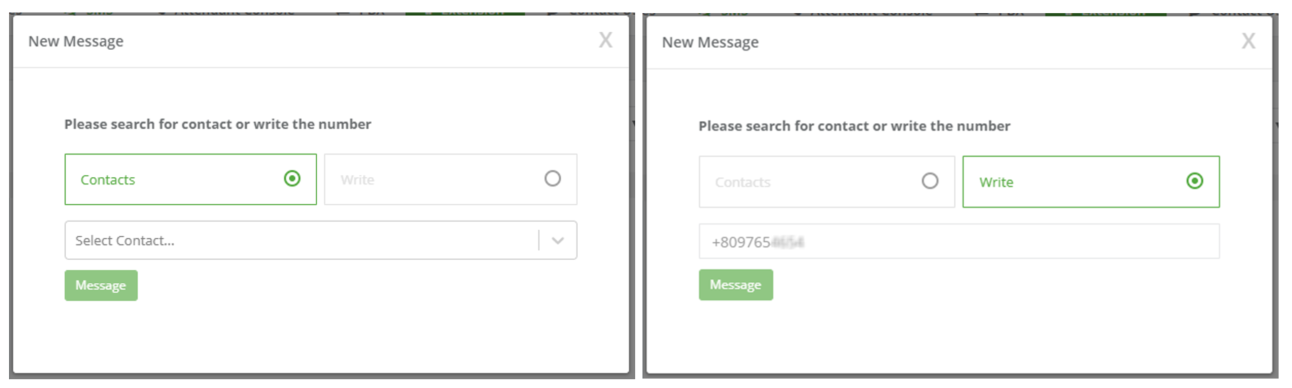
Notes:
- Pressing the “image” icon inside the message area will allow you to upload an image. (This is for MMS messages)
- Conversations with new messages will present as a green dot next to the name/number.
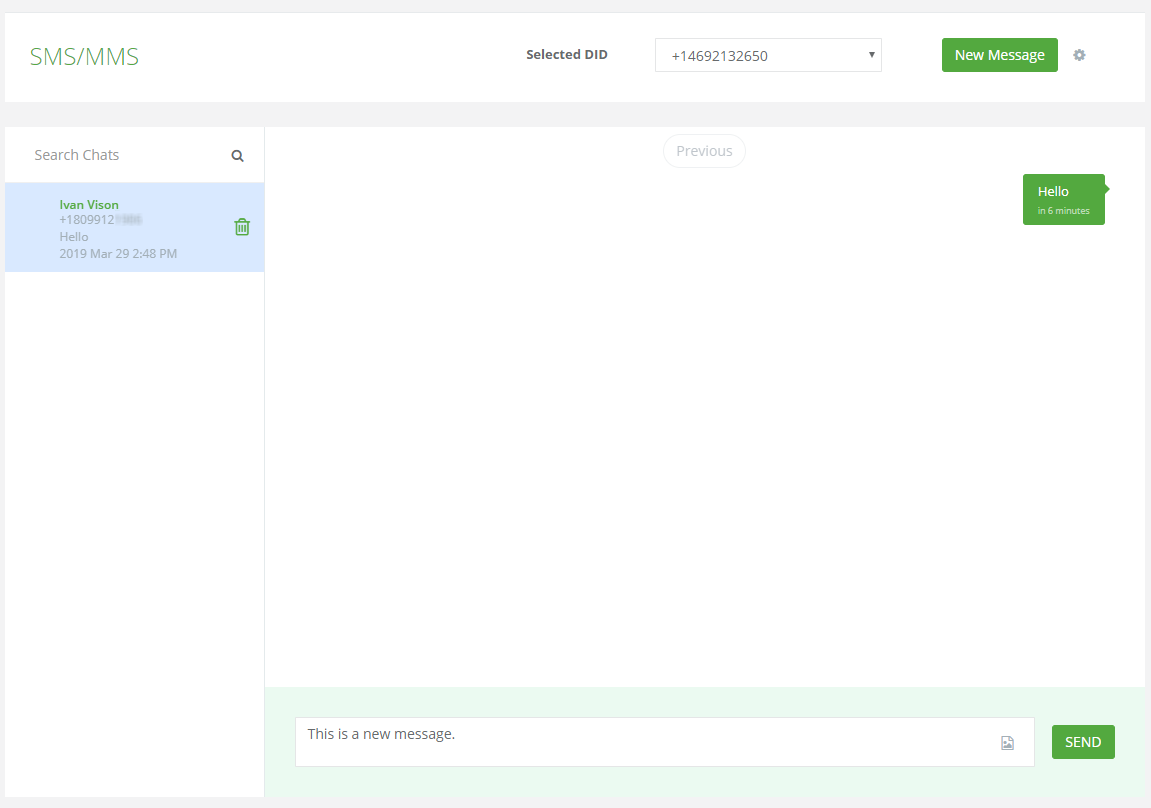
Open An Existing Conversation
On the left side of the screen, you will see all open conversations. Click on one conversation, then write the message in the message area, and click “Send.”
For assistance and troubleshooting of the SMS/MMS feature, you can send an email to our support team here.
Move between DIDs
To begin,
- Log in to the Customer Portal
- Go to SMS
You will be able to change between DIDs assigned to your user by using the “Selected DID” dropdown at the top.

Notes:
- New messages will be sent with the selected DID
- Conversations on the left will be shown based on the selected DID
- Default DID will appear automatically every time you enter the SMS section
SMS Settings
To configure your SMS/MMS settings, click the cog/settings icon next to the “New Message” button.

From within the configuration, the user can:
- Send SMS/MMS notification to phone and/or email
- Change Default DID
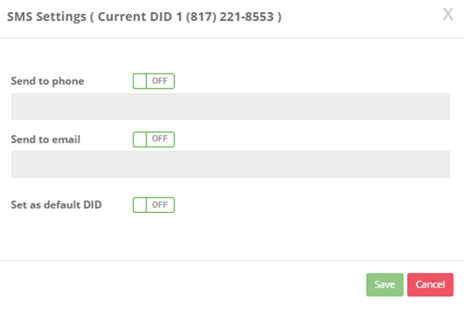
Notes:
- Notifications (phone/email) will include a link to the message in the Customer Portal.
- Configurations are per DID. You will be updating settings based on the DID you have selected in the dropdown.
Troubleshooting
- If you see an error, please make sure you have permissions enabled when going into the SMS section. If you do not have the permissions enabled, please contact support.
- If you do not see a DID in the “Selected DID” dropdown list, please make sure the SMS is activated for the user under the DID in the PBX Settings.
For assistance and troubleshooting of the SMS/MMS feature, you can send an email to our support team here.