What is an Auto Attendant?
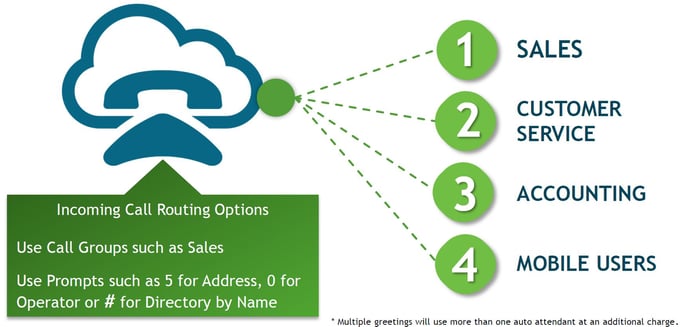
An auto attendant is a call routing system that serves as a self-service menu every time your customers call your business. GreenLink offers several options when it comes to setting up your company's auto attendant.
We can also accommodate your choice to work with a professional voiceover service or to record your own phone greetings.
Our system allows you to set up individual auto attendants for your different needs. For example, you can choose to have a Day, After Hours, and Holiday messages.
Below are some examples of what an Auto Attendant script could be:
SAMPLE DAY SCRIPT
Thank you for calling ABC Company. Our business hours are Monday – Friday, 8:30 am – 6:00 pm CST. If you know the extension of the person you are trying to reach, you may dial it at any time. For Sales, press 1. For a company directory by name, press #. For operator assistance, press 0. We look forward to speaking with you.
SAMPLE NIGHT SCRIPT
Good evening. Our office is currently closed. If this is an emergency, please press 0 to be transferred to our on-call technician for assistance. You may also leave a message by dialing the extension of the person you are trying to reach or by pressing # for the company directory. Thank you.
Note: The file formats compatible to use for the auto-attendant are WAV and MP3.
⇒ Items to consider including in your script: business hours, directions to the business address, how to reach an after-hours emergency technician, and holiday observance.
How to set up an AUTO ATTENDANT from the Customer Portal
Procedure
- Log in to the Customer Portal with the PBX Admin access
- Click on the PBX/Settings icon
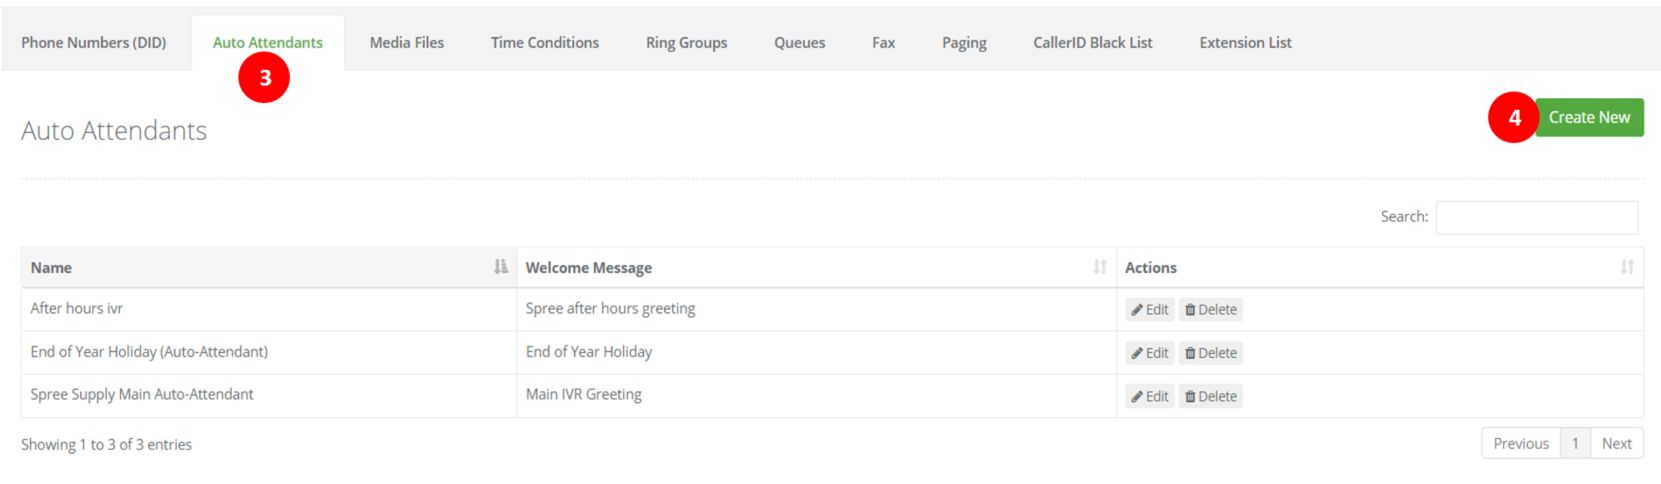
- Once the page loads click on the "Auto-Attendant" tab
- Then on the far right, find the "Create New" button and click on it
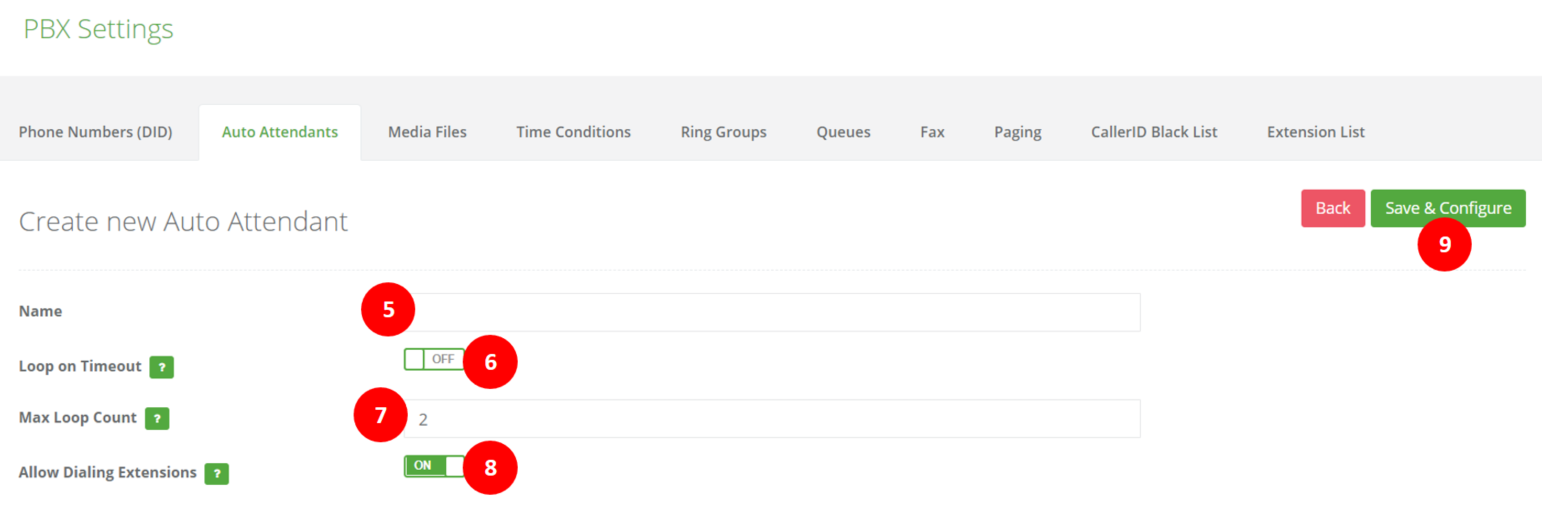
- Next to "Name", type the name of the new auto attendant
- Enable or keep disabled the "Loop On Time Out" option. (This will cause the auto attendant to repeat on a loop.)
- The following option will allow you to choose how many times will the loop happen if the "Loop On Time Out" option was enabled.
- The final option before saving the new auto attendant is "Allow Dialing Extensions", just as its name implies, when enabled this option allows the caller to exit the auto-attendant loop by dialing any extension desired.
- Once all steps have been done, proceed to click on "Save & Configure" to save the new auto attendant.
How to Configure an AUTO-ATTENDANT from the Customer Portal
Procedure
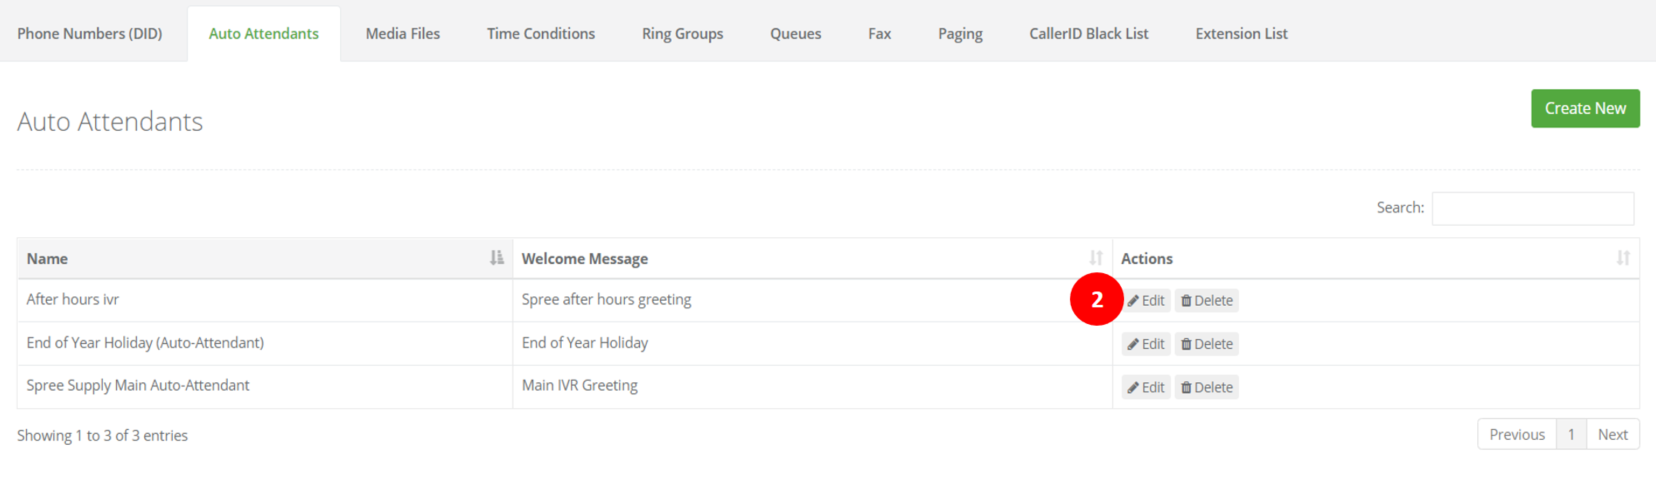
- Find the Auto Attendant you want to configure from the Auto Attendant tab in the Customer Portal.
- On the "Action" column click on the "Edit" pencil icon.
- Once the page loads, from the options on the left, you can see the changes or different settings that can be applied to your auto attendant.

- Selecting the "Welcome Message" option is the most important to select because that is where the media file designated for your Auto Attendant will be added.
- Once this is selected on the "Press 1", "Press 2" and similar options on the sequence you can choose additional extension options similar to what is done with ring groups:
- Extensions: Sends call to chosen extension
- Conditions: Sends the call to a designated time condition. I.E. Holiday/Office Closed.
- Auto-Attendant: Sends the call to a specific IVR. I.E. After-hours IVR.
- Ring Groups: Sends the call to another ring group.
- Voicemail: Sends the call to a voicemail. I.E. Receptionist Voicemail.
- Media files: Plays recorded message/greeting from saved media files. I.E. Main IVR.
- Custom Forward: Sends calls to an external custom number, such as a mobile number.
- Special: This adds a special IVR menu feature where calls are sent if no one in the ring group answers. I.E. Dial by name directory.
- Once all your desired options are selected click on "Save" to complete the configuration.